Please Wait...
Brief: this feature makes it easier to upload a large number of photos with different extensions at the same time.
To import your content, they have to be uploaded in the following path: contents/temp/namefolder.
1- Login to the control panel.
2- From the modules list, select (images module)> then (Collective importing) as shown in the below picture:

The below template will show up:
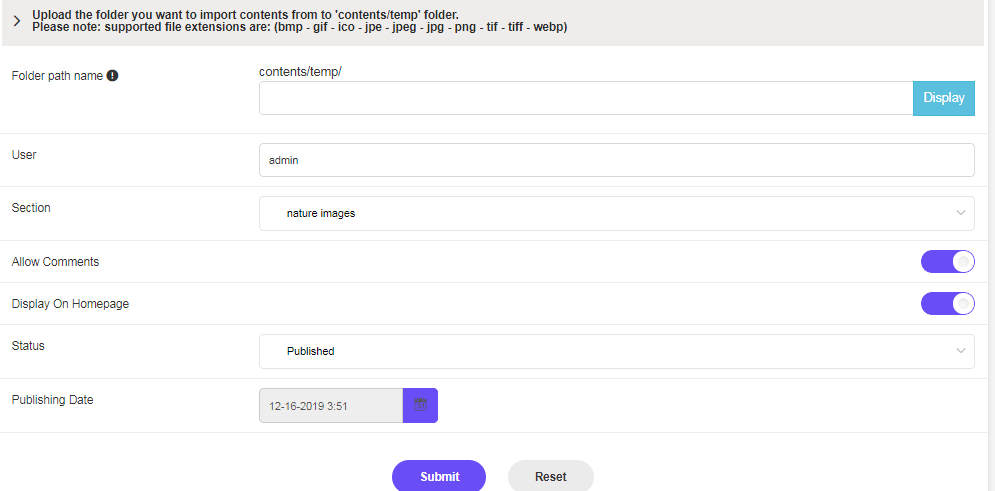
-Enter the uploaded folder name, then press (display) and a list of all included images will be shown.
Note: only folders with allowed extensions such as (jpg - png) will be shown, and others will be displayed with an error beside (not allowed folder extension).
-Enter the username that will be shown on the website beside the folders.
-Select the section that you want to add images to.
-You can activate or deactivate comments on collectively imported images, and being displayed on the homepage as well.
-Enter a new title of the content.
-Manage the contents order by using drag and drop technique.
-Set the status of the imported images and the publishing date.
Press (Submit) to save images and add them to the website.